Tutorial #1 - GIMP
Simple coloring using curves in GIMP.
Go from to
to 
Tutorial #2 - PS7
Using Curves and Selective Coloring in Photoshop 7
Go from to
to 
Tutorial #3 - PS7
Again, using curves and selective coloring in Photoshop 7. A more involved version of #2.
Go from to
to 
Tutorial #4 - Userinfo Banner - PS7
I believe this was requested by![[profile]](https://www.dreamwidth.org/img/silk/identity/user.png) tardisdoll
tardisdoll
Uses Selective Color, but pretty basic.
Go from THIS to THIS.
Hope these were okay, if anything's not clear, feel free to let me know, thanks! (And everything here is snagable)
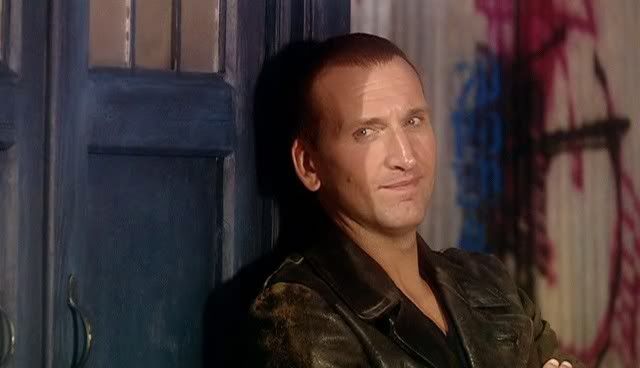
Simple coloring using curves in GIMP.
Go from
to For those that don't know the program GIMP, it's a completely free software that works similarly to that of Photoshop and Paint Shop Pro. It works very well, and most of my icon batches were made with GIMP, until I received a copy of Photoshop 7.0.
Anyway, step one would involve taking your cap, like this one, cropping it and sharpening to your liking.
Here's the base you'll start with.
Duplicate this, and set to screen at 50% opacity.
Flatten for new base.
Go to Layers>Colors>Curves
Value: 124/73
Red: 133/182
Green: 134/181
Blue: 136/180
Flatten.
See, very simple and you have either your finished product or a new base to do what you will with.
Remember to play around with your settings, as these won't work on every image.
Anyway, step one would involve taking your cap, like this one, cropping it and sharpening to your liking.
 Here's the base you'll start with.
Duplicate this, and set to screen at 50% opacity.
Flatten for new base.
Go to Layers>Colors>Curves
Value: 124/73
Red: 133/182
Green: 134/181
Blue: 136/180
Flatten.
See, very simple and you have either your finished product or a new base to do what you will with.
Remember to play around with your settings, as these won't work on every image.
Tutorial #2 - PS7
Using Curves and Selective Coloring in Photoshop 7
Go from
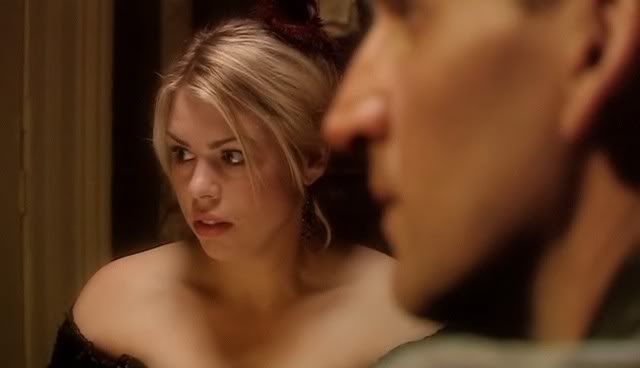
to Starting from your cap, crop it, but don't shapen it yet.
Duplicate your base: and set that layer to screen 80%. Sharpen this layer only.
Go to Layers>New Adjustment Layer>Curves
RGB: 202/191
Red: 138/179
Green: 140/184
Blue: 140/188
Go to Layers>New Adjustment Layer>Selective Color
Reds: -60/-12/60/60
Yellows: 20/-30/-70/40
Neutrals: 12/8/4/-5
Flatten.
Play around with numbers, especially the selective color settings. They will NOT work on every image. Have fun.
Duplicate your base:
and set that layer to screen 80%. Sharpen this layer only.Go to Layers>New Adjustment Layer>Curves
RGB: 202/191
Red: 138/179
Green: 140/184
Blue: 140/188
Go to Layers>New Adjustment Layer>Selective Color
Reds: -60/-12/60/60
Yellows: 20/-30/-70/40
Neutrals: 12/8/4/-5
Flatten.
Play around with numbers, especially the selective color settings. They will NOT work on every image. Have fun.
Tutorial #3 - PS7
Again, using curves and selective coloring in Photoshop 7. A more involved version of #2.
Go from
to Trying something new, take your cap, and scale it down it icon height. (Width will vary, but height should be 100)
Duplicate the base twice. Do NOT sharpen yet.
Set the first layer to 50% opacity, keep normal and sharpen.
Set the second layer to screen at 20%, and sharpen it too.
New Adjustment Layer>Curves
Red: 140/179
Green: 138/185
Blue: 141/188
New Adjustment Layer>Selective Color
Reds: -100/-20/100/100
Yellows: 20/-35/-75/40
Cyans: 50/50/-50/50
Neutrals: 12/10/5/-5

Flatten image and crop.
Again, settings will definitely not work on every cap, so please, play with the setting.
Duplicate the base twice. Do NOT sharpen yet.
Set the first layer to 50% opacity, keep normal and sharpen.
Set the second layer to screen at 20%, and sharpen it too.
New Adjustment Layer>Curves
Red: 140/179
Green: 138/185
Blue: 141/188
New Adjustment Layer>Selective Color
Reds: -100/-20/100/100
Yellows: 20/-35/-75/40
Cyans: 50/50/-50/50
Neutrals: 12/10/5/-5
Flatten image and crop.
Again, settings will definitely not work on every cap, so please, play with the setting.
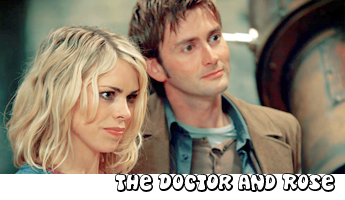
Tutorial #4 - Userinfo Banner - PS7
I believe this was requested by
Uses Selective Color, but pretty basic.
Go from THIS to THIS.
Take this original image from the BBC official site.
Crop it, I ended up with this.
Scale it to any size you want, I scaled it down to 345x200
Create a new layer, and fill it with a light peach color. I used #FEEED3.
Set to soft light, 100% opacity.
Layers>New Adjustment>Selective Color
Reds: -100/0/100/100
Yellows: -20/0/-20/0
Neutrals: 25/-10/-10/5
This definitely will not work with every image, play with the settings.
This is what we have:

So, David Tennant's eye is doing something funky, something from the original.
There's probably a better way to fix it, but I went the lazy route.
I made a new layer, took a dark brown color, and colored in that one eye. Set that to soft light, 100% opacity. And duplicated that layer, kept the same settings.
This is all completely optional because this is not the case in other pictures.
So here's the image after:

Like I said, it's not the perfect solution, but it's good enough for me. If there's a different, better way to fix it that you know of, let know me, thank you!
Now, flatten everything. Create a new layer.
Select a small portion at the bottom and fill with white.
Add the text you want, like The Doctor and Rose, with any font you want.
Flatten image and you're done:

Crop it, I ended up with this.
Scale it to any size you want, I scaled it down to 345x200
Create a new layer, and fill it with a light peach color. I used #FEEED3.
Set to soft light, 100% opacity.
Layers>New Adjustment>Selective Color
Reds: -100/0/100/100
Yellows: -20/0/-20/0
Neutrals: 25/-10/-10/5
This definitely will not work with every image, play with the settings.
This is what we have:
So, David Tennant's eye is doing something funky, something from the original.
There's probably a better way to fix it, but I went the lazy route.
I made a new layer, took a dark brown color, and colored in that one eye. Set that to soft light, 100% opacity. And duplicated that layer, kept the same settings.
This is all completely optional because this is not the case in other pictures.
So here's the image after:
Like I said, it's not the perfect solution, but it's good enough for me. If there's a different, better way to fix it that you know of, let know me, thank you!
Now, flatten everything. Create a new layer.
Select a small portion at the bottom and fill with white.
Add the text you want, like The Doctor and Rose, with any font you want.
Flatten image and you're done:
Hope these were okay, if anything's not clear, feel free to let me know, thanks! (And everything here is snagable)
no subject
Date: 2006-10-28 07:45 pm (UTC)no subject
Date: 2006-10-28 07:47 pm (UTC)no subject
Date: 2006-10-28 07:57 pm (UTC)no subject
Date: 2006-10-28 09:09 pm (UTC)There are so many tutorials for PS7, the only ones I've found for GIMP are really crappy IMO, so I think if I do anymore, it'll be for GIMP. So if you have any questions about it, let me know!
no subject
Date: 2006-10-28 10:04 pm (UTC)I love all of these, wonderful coloring and so simple!
added to my tutorials list here:
http://tardisdoll.livejournal.com/12144.html
Thank you! :D
no subject
Date: 2006-10-28 11:01 pm (UTC)no subject
Date: 2006-10-28 11:02 pm (UTC)no subject
Date: 2006-10-29 07:37 am (UTC)no subject
Date: 2006-10-29 04:25 pm (UTC)no subject
Date: 2006-10-29 06:21 pm (UTC)no subject
Date: 2006-10-29 06:29 pm (UTC)I tried to explain GIMP in the post, but it's just like Photoshop, of course a bit different, maybe not as good, but it's completely free, no strings attached. I used it on the majority of my icon posts until I got Photoshop. In fact, I'll probably be doing more GIMP tutorials because the only ones I've seen are really crappy.